The Gap That Decides Everything: Filling Paving Joints for UK Weather
The bit everyone skips
Walk onto a patio that's failing and your eye goes to the wobbly corner or the stained slab. Nine times out of ten, though, the trouble started in the gap between the paving. Joints are the smallest visible detail on the job and the most common reason a customer rings you back six months later. They do four jobs at once: they lock units together, they keep the bedding dry, they let water move where you want it to, and they give the paving room to breathe as the ground shifts and the seasons turn.
Get them wrong and you get sand washing out, weeds taking hold, slabs rocking, mortar smeared across faces, and spalling after the first hard frost. Get them right and nobody notices them — which is exactly the point.
What the joint is actually doing
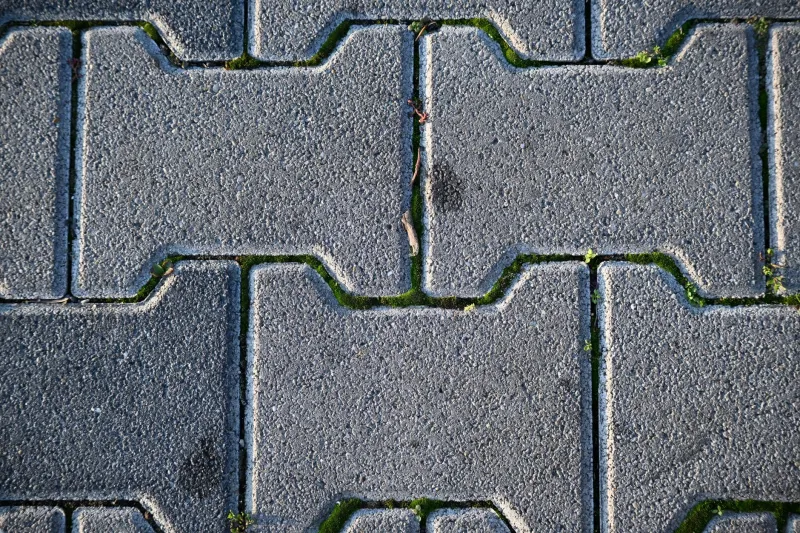
Think of the joint as a controlled gap rather than a decorative line. It transfers load between neighbouring units so a point load on one block is shared with its neighbours. It acts as a drainage channel, letting surface water reach the sub-base or the fall instead of sitting on the surface. It gives the paving somewhere to expand into when the temperature climbs. And it seals the bedding layer from the weather, because wet bedding under a freeze is how you get frost heave and blown faces.
That's why joint width isn't a cosmetic choice. Too tight and the units chip against each other and the jointing material can't get in. Too wide and the joint becomes a sump that holds water and loses its interlock.
Widths, in plain terms
Manufacturer instructions always win, but here's the working range for typical UK jobs. Block paving wants roughly 2–5 mm between units, and the same gap should run consistently down the whole run — inconsistency is what makes a laid pattern look amateur. Clay pavers can sit at the wider end of that range. Natural stone flags on a rigid mortar bed usually want around 10–15 mm, partly because stone edges are rarely perfectly straight and partly because lime or cement mortar needs some depth to grip. Porcelain is the fussy one: most systems want something in the region of 3–6 mm, and the exact figure depends on whether you're using a slurry, a two-part resin or a fine mortar. Read the box. The box knows things.
Sand: the workhorse for block paving
Kiln-dried sand is the default for block paving, and for good reason. It's cheap, it's fast, and it's forgiving. The critical bit is the word kiln-dried. Builder's sand is damp and claggy, bridges across the joint instead of filling it, and leaves voids underneath that open up the first time it rains. Brush kiln-dried sand in dry, in thin passes, and vibrate it in properly. Then top it up. Then top it up again after the first month, because it will settle.
Sand is not a jointing material for flagstones or porcelain. It doesn't bind, it washes out on any decent slope, and it's a standing invitation to weeds and ant nests. If someone tells you to point a sandstone patio with sand, walk away politely.
Cement mortar: still the standard for flags
A 4:1 sharp sand to cement mix remains the go-to for natural stone and concrete flags on a rigid bed, and it's fine in the right hands. The right hands means someone who knows how to tool a joint without smearing the face of the stone — because once cement mortar cures on sandstone or limestone, you're not cleaning it off, you're living with it. Use a pointing gun or a trowel and a jointer, keep the mix stiff rather than sloppy, and never point in full sun or a drying wind. Damp the joint first in hot weather so the mortar doesn't grab too fast.
One important caveat: mortar joints are rigid, so the paving beneath them must be rigid too. Point a flexible block paving job with mortar and it will crack into a nice map of every vehicle that's ever crossed it.
Resin and polymeric: the modern option
Two-part resin jointing — the pourable slurry type — has become the sensible default for porcelain and for anyone who wants a joint that stays put. It's mixed with water, poured across a saturated surface, worked into the joints, and cleaned off before it sets. Do it wrong and you get a hazy film across the whole patio that takes a week and a lot of solvent to shift. Do it right and you get a firm, permeable, weed-resistant joint that copes with frost and doesn't wash out on a slope.
Single-part polymeric compounds are the easier DIY cousin: brush in, mist with water, done. They're decent on domestic patios but less tolerant of poor preparation and more likely to shrink or soften in persistent wet. Either way, resin products need a joint of at least 5 mm and a clean, dry, frost-free day. Check the temperature range on the tub; many won't cure below 5°C, which rules out most of December.
Movement joints aren't optional
Every patio needs somewhere to move. Put movement joints at the perimeter against walls and kerbs, where paving meets a different material, and at regular intervals across the field — commonly every 6–8 m, though the design and the manufacturer's guidance should set the figure. On block paving, the edge restraint does much of this work, but a long run still benefits from a proper movement break. Skip them and the paving will make its own, usually in a straight line through the nicest slab in the garden.
Drainage and frost: the two tests that matter
A joint that holds water is a joint that will fail. On a permeable system, the joint is part of the drainage path, so filling it with a solid mortar defeats the whole design. On a conventional patio, the joint should let the small amount of water that gets past the surface escape, while the fall takes the rest. Keep the joint full to within a couple of millimetres of the surface — a half-empty joint is a reservoir, and a reservoir is what freezes and spalls the edge of the paving.
Keeping them right
A quick autumn walkaround pays for itself. Top up sand joints on block paving before winter. Cut out failed mortar and re-point while the weather's still mild. Pull weeds while they're small, because a well-established weed will lever a joint open over a season. And go easy with the pressure washer: blast a joint at close range and you'll empty it in seconds. Ten minutes with a brush and a bag of kiln-dried sand beats an afternoon of repairs every time.
The gap is small. The consequences aren't.